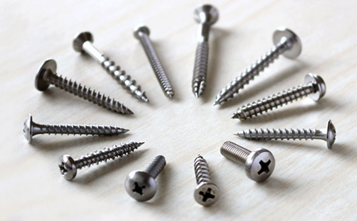
1. Thread is a shape with uniform helix protrusions on […]
1. Thread is a shape with uniform helix protrusions on the cross section of the solid outer or inner surface. According to its structural characteristics and uses, it can be divided into three categories:
(1) Ordinary thread: the tooth shape is triangle, used to connect or fasten parts. Ordinary threads are divided into coarse and fine threads according to the pitch, and the connection strength of fine threads is higher.
(2) Transmission thread: the tooth shape includes trapezoid, rectangle, saw and triangle.
(3) Sealing thread: used for sealing connection, mainly pipe thread, taper thread and taper pipe thread.
2. Thread fit level:
Thread fit is the size of looseness or tightness between screwed threads, and the level of fit is the specified combination of deviations and tolerances acting on internal and external threads.
(1) For unified inch threads, there are three thread levels for external threads: 1A, 2A and 3A, and three levels for internal threads: 1B, 2B and 3B, all of which are clearance fits. The higher the level number, the tighter the fit. In the inch thread, the deviation is only specified for 1A and 2A grades, the deviation of 3A grade is zero, and the grade deviations of 1A and 2A are equal. The larger the number of levels, the smaller the tolerance.
1. Class 1A and 1B, very loose tolerance class, which is suitable for the tolerance fit of internal and external threads.
2, 2A and 2B grades are the most common thread tolerance grades specified for the inch series mechanical fasteners.
3, 3A and 3B grades, screwing to form the tightest fit, suitable for fasteners with tight tolerances, for the key design of safety.
4. For external threads, 1A and 2A have a matching tolerance, and 3A does not. The 1A tolerance is 50% larger than the 2A tolerance and 75% larger than the 3A tolerance. For internal threads, the 2B tolerance is 30% larger than the 2A tolerance. Class 1B is 50% larger than Class 2B and 75% larger than Class 3B.
(2) Metric thread, external thread has three thread grades: 4h, 6h and 6g, internal thread has three thread grades: 5H, 6H, 7H. (Japanese standard thread accuracy grades are divided into three levels: I, II, and III. Normally, it is level II.) In metric threads, the basic deviation of H and h is zero. The basic deviation of G is positive, and the basic deviation of e, f, and g is negative. as the picture shows:
1. H is the commonly used tolerance zone position for internal threads. Generally, it is not used as a surface coating, or a very thin phosphating layer is used. The basic deviation of G position is used in special occasions, such as thicker coating, which is generally rarely used.
2. g is often used to plate a thin coating of 6-9um. For example, the product drawing requires a 6h bolt, and the thread before plating adopts a 6g tolerance zone.
3. It is better to combine the thread fit into H/g, H/h or G/h. For the thread of refined fasteners such as bolts and nuts, the standard recommends using 6H/6g fit
(Three), thread mark
4. Main geometric parameters of self-tapping and self-drilling threads:
(1) The major diameter/outer diameter of the tooth (d1) is the imaginary cylindrical diameter where the thread crest overlaps. The major diameter of the thread basically represents the nominal diameter of the thread size.
(2) Minor diameter/bottom diameter (d2): the diameter of the imaginary cylinder where the thread bottom overlaps.
(3) Tooth pitch (p): is the axial distance between two adjacent teeth on the median meridian
